
Adding New Contacts
Adding New Survey Receivers (Contacts)
The people that receive the Brilliant Rapid Feedback Surveys are called Contacts.
1. Select "Contacts" tab in the left sidebar.
2. Click on the Plus sign to add a Contact

3. Fill in the fields
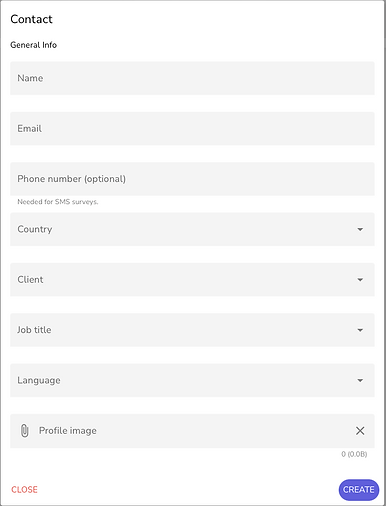
Name: Name of Person receiving the surveys
Email: The email the person uses. This is the email address the surveys and other communication is sent to.
Phone number: This is optional and only used if you want to send the surveys or reminders to this persons phone number. Please make sure you have the Contacts permission to send to their phone number as some might feel it can be spammy.
Country: Where the Contact situated? This is used for statistical purposes if you want to see differences between users in different countries.
Client: Here you choose the company this contact works for.
Job title: Select the job title or role of the contact. This is done for statistical purposes as well as some roles get different questions that others. If you can not see the exact title please choose the closest resembling your contact's role at the company.
Language: Select the Language you would like to send the Surveys in and some other communication that is translated. The current languages we offer will be displayed.
Profile image: If you have a photo of your contact please upload it. Although not necessary it makes the Cliezen dashboard more pleasing to look at and more personal when you have photos of your contacts.
4. Click Create
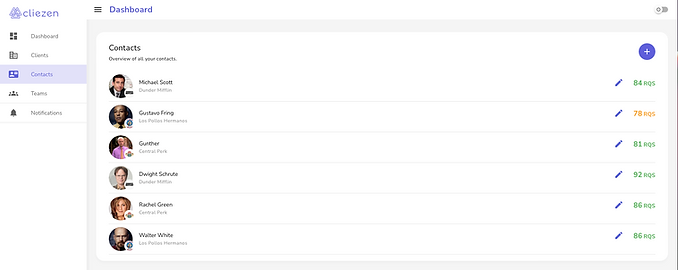
Once you've added all your Contacts you can click on Contacts on the side menu and see a list of all Contacts.
5. Enroll Contacts
Surveys are NOT sent out until you have activated/enrolled the Contact.
Bulk Importing
Uploading Contacts with Excel file - Brilliant Onboarding
It‘s easy to upload all your contacts to Brilliant at once using our bulk upload feature.
It is important that before you upload the file with Contacts that you have already created the Clients for all of the Contacts you are uploading - otherwise you will get an error.

You can use the BrilliantUploadTemplate.xlsx or simply make sure that there are 7 columns in your file in the following order with each column header:
name, email, jobTitle, country, language, client, phone
Notice that phone is optional and only used if you wish to enable the SMS feature.